
眠るシーラカンスと水底のプログラマー
Winodws Phone, Windows, EC-CUBEの情報を発信しますユニバーサルWindowsアプリ(Pre)入門024:タイトルバーを操作する
日曜日 , 12, 7月 2015 WinRT(UWP), UWP(Win 10) Preview Leave a comment毎度のお約束、本記事はプレビュー状態のOS、IDE、SDKを利用しております。製品版では異なる可能性があります。
本記事はWindows 10向けのユニバーサルWindowsアプリについて学んだことを残して行く記事です。
これまでの記事はカテゴリ「UWP(Win 10) Preview」を参照ください。
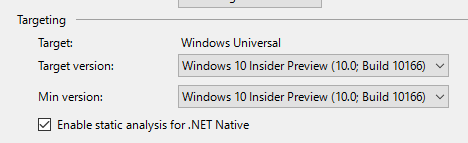
今回よりデスクトップ、Windows Phoneともに検証用のSDKのバージョンが10166に変更されます。
タイトルバーを操作
今回はGitHubのサンプルからTitleBarプロジェクトを紹介します。
UWPアプリケーションはWin 8.1のストアアプリができなかったタイトルバーの操作が可能です。
タイトルバーというのはWindows表示のアプリケーションの上部にあるバーのことです。
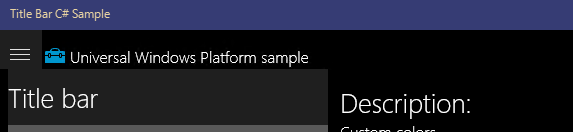
こんな感じで上部のバーの色を変更したりできます。
タイトルバーを取得する
タイトルバーの取得はこんな感じ。GetForCurrentView()でApplicationViewを取得してTitleBarプロパティを取得します。
titleBar = ApplicationView.GetForCurrentView().TitleBar;
タイトルバーの色を変える
タイトルバーの色の操作はこんな感じ。
// Title bar colors. Alpha must be 255.
titleBar.BackgroundColor = new Color() { A = 255, R = 54, G = 60, B = 116 };
titleBar.ForegroundColor = new Color() { A = 255, R = 232, G = 211, B = 162 };
titleBar.InactiveBackgroundColor = new Color() { A = 255, R = 135, G = 141, B = 199 };
titleBar.InactiveForegroundColor = new Color() { A = 255, R = 232, G = 211, B = 162 };

// Title bar button background colors. Alpha is respected when the view is extended
// into the title bar (see scenario 2). Otherwise, Alpha is ignored and treated as if it were 255.
byte buttonAlpha = (byte)(TransparentWhenExtended.IsChecked.Value ? 0 : 255);
titleBar.ButtonBackgroundColor = new Color() { A = buttonAlpha, R = 54, G = 60, B = 116 };
titleBar.ButtonHoverBackgroundColor = new Color() { A = buttonAlpha, R = 19, G = 21, B = 40 };
titleBar.ButtonPressedBackgroundColor = new Color() { A = buttonAlpha, R = 232, G = 211, B = 162 };
titleBar.ButtonInactiveBackgroundColor = new Color() { A = buttonAlpha, R = 135, G = 141, B = 199 };

// Title bar button foreground colors. Alpha must be 255.
titleBar.ButtonForegroundColor = new Color() { A = 255, R = 232, G = 211, B = 162 };
titleBar.ButtonHoverForegroundColor = new Color() { A = 255, R = 255, G = 255, B = 255 };
titleBar.ButtonPressedForegroundColor = new Color() { A = 255, R = 54, G = 60, B = 116 };
titleBar.ButtonInactiveForegroundColor = new Color() { A = 255, R = 232, G = 211, B = 162 };
タイトルバーの見た目をカスタムする

ちょっとした色の変更とかじゃなくて、表示をカスタムしたい場合UserControlを利用するようだけどちょっと面倒。
CoreApplication.GetCurrentView().TitleBar.ExtendViewIntoTitleBar = extend;
拡張できるようにフラグを立てる。
そしてカスタムツールバーであるCustomTitleBarを生成して、メインページをカスタムツールバーにセットすることでカスタムツールバーをメインのページの親に設定したのちに、ページのコンテンツをカスタムツールバーにするという流れ。
たぶん上の説明ではよくわからないと思うので、以下のコードや実際にサンプルを眺めてみることを推奨します。
customTitleBar = new CustomTitleBar();
customTitleBar.EnableControlsInTitleBar(areControlsInTitleBar);

// Make the main page's content a child of the title bar,
// and make the title bar the new page content.
UIElement mainContent = this.Content;
this.Content = null;
customTitleBar.SetPageContent(mainContent);
this.Content = customTitleBar;
Please give us your valuable comment